I'm writing a non-van-related post here partly because I'm stuck outside the Halifax Nova Scotia airport with my return flights to Houston delayed at least 8 hours. This type of delay has been so common in our experience - during one memorable year, our Houston to Halifax flight-related vacation delay amounted to FOUR DAYS plus seven hundred dollars in extra expenses that United Airlines refused to refund to us (our flight cancellation occurred at the halfway point which was Newark Liberty airport and so we were stuck there paying exorbitant hotel and taxi fees) - that it was largely the original inspiration behind our Airstream Interstate purchase two and a half years ago. My best-case door-to-door travel scenario right now is 18 hours, and it very well might be longer (and often is... EDIT: It ended up being 22 hours on this day). With air service being that bad, why not drive? It's only 40 hours up here by road, not to mention one hell of a lot cheaper, especially if you Crackerdock along the route.
Anyway, do you ever read blog posts about someone's travel adventures only to end up with an urge to slap the blogger? They shallowly oooohh and aaahh about the exact same crap that every other tourist sees, and you end up concluding, "There's ten minutes of my life that I'll never get back" because you regret taking the time to read the post.
I don't want to fall into that category, so what I'm going to do below is present a photo tour in a non-stereotypical way. So maybe it's still a time-waster, but at least it's not cut out of that same tired cloth. A little less mindless tittering, and a little more perspective and magic realism, perhaps.
The most rewarding travel is all about seeing the more subtle details that many other people miss.
Like the color of the water, for instance. The northeastern coast of Cape Breton was experiencing unusual gale-force winds, to the point where many lobster traps were destroyed and valuable pre-spawning lobsters killed. That part was a bad thing, but the same conditions turned the seas a shade of sapphire that I have rarely seen. This is the coast at Louisbourg with no photo enhancement.
And it made a particularly vivid juxtaposition with the colors of the land.
Including the lichens.
I grew up 20 miles from Fortress of Louisbourg National Historic Site, so its novelty wore off for me about half a century ago. But choosing to see it on opening day 2017, which happened to coincide with Victoria Day, when it was candidly exposed and not really ready for seasonal prime time, was a new experience.
It only opens during the tourist season, and winter damage from that wild, wild sea was visible everywhere. The area experienced an unusually late spring, so pre-tourist repairs were behind schedule. In this location, the sea had blasted through one of the canon portals and scoured out the base of it. Discombobulated lumber was scattered everywhere.
With no animators and almost no visitors present, the photographic opportunities were unprecedented. The faithfully-reproduced scenes from the year 1750 were vacant and smelled unusually authentic, given that they had just been re-opened after a winter of hibernating under wraps.
Of course there are no electric lights in the reproduction buildings. Just an eerie glow of ambient daylight.
The animators (costumed interpreters) were not yet on the job, but the management staff had loaded in some of the smaller livestock, which was still getting itself oriented. Some animals were running at large, like this guy in all his typical rooster attitude.
One of the period buildings in the town.
I don't recall another time when I was able to take a picture of the main fortress chapel without having throngs of tourists below.
On all of our trips to Nova Scotia (where I still have family), we always resolve to do at least One New Thing. That way it doesn't feel like the same trip year after year.
And this year that one new thing was the Pomquet Acadian trails, some coastal hiking trails situated on a headland in geology with which I am much less familiar (I did my first degree, a Bachelor's in geology, here in Nova Scotia). The trails are located about 15 minutes north of the Trans Canada Highway, just before the town of Antigonish. I had to drive by this area anyway, coming back down from Cape Breton to the Halifax airport for my flight.
Despite gale force winds, it was an interesting time to visit this area, as life was struggling to emerge in late spring conditions that were rather hostile.
Maple leaves start red, turn green, and then end red several months later.
Buds everywhere. I don't know what this is.
I do know what this is - an orchid, which Nova Scotia has in abundance.
More new growth. This reminds me of baseball players signalling each others, when they will hold three fingers pointed at the ground.
I had never seen an ant bed this large in Nova Scotia. My foot for scale. When we were children, we called these things "black ants" and didn't fear them as much as the province's bad-tempered "red ants", which use their massive mandibles to bite at every opportunity.
Black bear scat. There was a large fresh deposit distributed around the trail, of which this was one cohesive nugget. It did not stink, suggesting that the bear had been eating green vegetation alone, which makes sense because nothing else is growing right now (when they start varying their diet later in the growing season, it gets pretty pungent). I've never seen a bear in the wild, but I believe that day will come. There have been too many close encounters, too many times when I've seen fresh scat, or fresh paw prints, or even smelled a bear just out of sight in the thick woods. They're everywhere here.
Maybe she was eating some of these - new ferns about to unfurl.
Nova Scotia has been hit by a number of hurricanes and tropical storms lately, not to mention northern storms in winter. Most of the softer (i.e., soil-rich) coast shows conspicuous damage.
And this location was no exception. There's that cliff erosion.
There were bits of smashed lobster traps scattered way back into the coastal forest.
It almost looks like the cliff-dwelling trees are begging the sea to take them and finally put them out of their erosional misery, as they strain and gesture toward it.
The weather was extremely unsettled - I picked a good location for the hike because the Pomquet headland blocked some of the most severe winds. But the view out over the water revealed this ominous blackness at the horizon.
This area had more sedimentary rocks than many other coastal locations with which I am familiar, but the beach melange was very typically Nova Scotian, combining lithologies from hundreds of miles around. And how is that possible, you may wonder? In a word, glaciation. As I took this picture, I acknowledged to myself that it's no wonder that so many people can't visualize climate change being a largely natural process - they didn't grow up as I did, surrounded every moment of every day with the incontrovertible and overwhelming evidence of the extraordinary magnitude of glaciation, and the fact that the natural sea level varied anywhere from 246 feet below to 330 feet above its present level (PDF link). That historical climate change, and the glaciation triggered by it, is the primary reason why Nova Scotia ended up with the natural beauty that it has, which, in turn, is why it attracts over $2 billion per year in tourism revenues, despite being a small province with a population of only about 943,000. Most of those tourists walk upon shores like this one with no clue as to the significance of what they're actually seeing. We have poor public science education to thank for that.
It's a natural extension of the #vanlife construct, at least as I perceive that construct (which is less about Bohemian-style personal indulgences and more about strategic adventure):
What if, instead of building or buying a conventional summer cottage, one were to convert a piece of private property to serve as a geographical base for a rolling summer cottage that takes the form of an Airstream Interstate?
On user forums, we've seen owners either or buy or build specialized residential garages to accommodate their Interstates. So what about remote properties that are configured for the purposes of periodically driving the Interstate "cottage" into? Here's our rig parked at the side of the access road to a piece of land I've owned in Nova Scotia for decades, but I hadn't put it to any use previously. Right now it's an impenetrable and chaotic young spruce forest that sprang up after the previous owner clear cut it as logging land. But what else might be done with it, in a minimalist but accommodating style? In this type of scenario, what is the maximum bang for the minimum buck?
There are a number of potential advantages to this approach, advantages which revolve around regulatory simplification, maximizing security, and minimizing costs both coming and going (there's a pun in there somewhere):
If one's rig has a strong boondocking capability, the cost of such a project does not extend much beyond the cost of the undeveloped real estate itself.
There's no need to run expensive utilities to such a property, and no need for the often arduous and stringent developmental permits that must precede them.
There's no need to incur insurance costs, because there are no fixed structures or improvements beyond perhaps a small parking pad which is basically indestructible.
Forward real estate costs, including municipal taxes, remain as low as possible for the same reason. The primary investment is in the Interstate, not the fixed assets.
There's no worries about challenges like vandalism or squatting when the lawful owner is not present because there's nothing to vandalize or illegally occupy.
The property itself gets to remain almost entirely in its natural evolving state, which is great for those of us who prefer an immersive wilderness experience when we travel. It's not quite a Leave No Trace (LNT) scenario, but it's probably the closest van-related thing to it.
Everything I've listed above not only saves money - it all saves that more precious commodity known as TIME. Less time on developing a vacation property means more time to enjoy that same property.
So this was our general line of thinking when we set about trying to discern how we might minimally improve this piece of land to accommodate our Interstate. Here are a few pictures and musings during the initial part of this process.
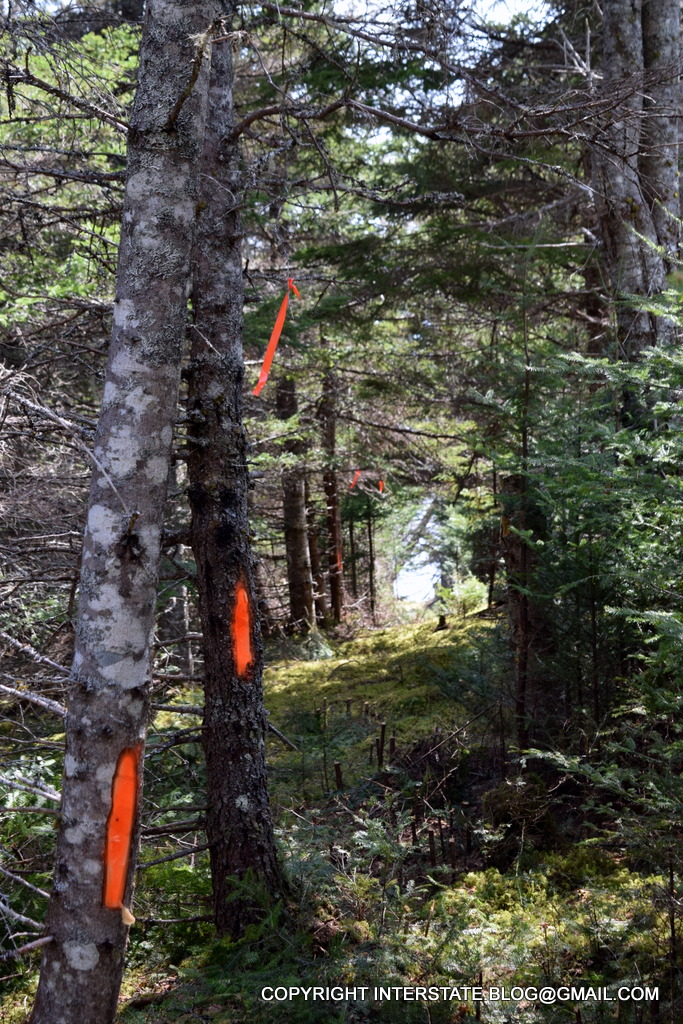
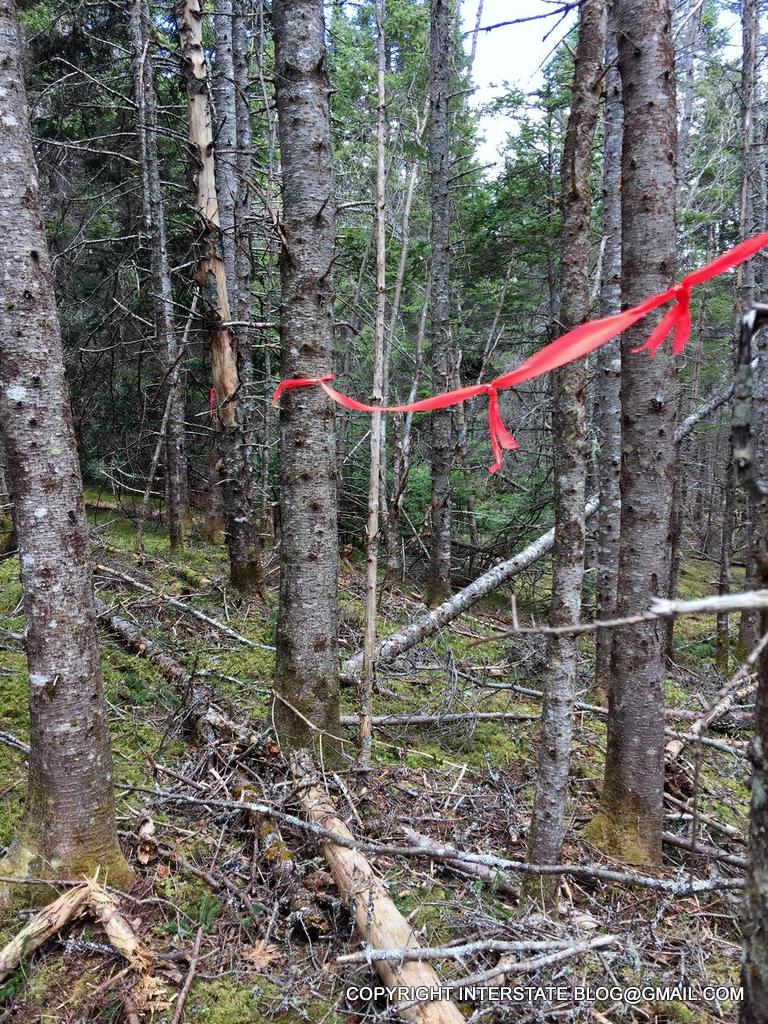
The first thing I had to do was re-cut and re-blaze the existing survey lines in that impenetrable mass, so that I could get some bearings. There's light at the end of that tunnel.
Someone decided that one of my survey markers would make a nice chew toy. Judging from the size of the teeth marks, I'd surmise perhaps a fox or a raccoon.
Believe it or not, this view exists, somewhere beyond that impenetrable mass. Unfortunately, clear-cutting a forest of this type results in a period of intense disequilibrium as the new growth fights to see which individual trees and plants will out-compete all the others. It's literally a race to the top in which most trees naturally become losers which then litter the forest floor. I titled this post "STUMBLING toward a new summer cottage paradigm" because that's mostly what I did during my scoping - I tripped, fell, bruised, and stumbled among all those deadfalls.
See, if I get down a bit closer to the water, you can tell that I'm not lying to ya. There is actually a view in there somewhere, if only all those deadfalls and widowmakerscould be thinned out.
As I took this photo, it was mid-May in Nova Scotia, and temperatures were hovering in the high-30's, giving a wintry, somber appearance to the landscape. It was nice and cool for clearing a bit of deadwood, a task that would more typically have me sweating.
OK, then, so visualize the rear end of an Airstream Interstate eventually able to be situated where this flagging tape is placed. A rear end facing a lake view as yet to be revealed.
So I hatched a minimally-invasive plan to potentially make this happen, and as I write this, I still don't have confirmation from a contractor that it would be technically feasible or advisable as I'm going to propose. Getting clarity on that is the next step in this process. Meanwhile as I work that out, I'll leave you with a couple of macro shots, and a different kind of money shot at the very end.
When I literally can't see the forest for the trees, sometimes I find it relaxing to focus on the macro-world. I noticed for the first time on this trip that there's a local northern plant that looks a lot like southern Spanish moss. True Spanish moss is a subtropical plant, so it must be a different species.
This is the more typical northern lichen that is ubiquitous in the area.
After being bruised and battered stumbling around a chaotic forest, one can always find solace in the likes of this:
Luckily for me, I arrived a few days after the opening of lobster season, and they were in peak condition. I've never had better lobster.
EDIT: The project did get developed, and further details can be found in the blog post titled Top ten lessons form an off-grid month on the road. And here are a couple of pics of the finished product.
Just a couple of pics of the US Army Corps of Engineers campground known as Sandy Creek Park, becauseI've posted about it before, almost two years ago. The real treat in this blog post comes at the very end.
View from my back door, before sunset.
There's the beginning of the sunset, and my Live Infinitely hammock.
It was a show-stopper, I tell you, but not as much of a showstopper as this next bit.
Here's what you need to do for full authentic effect. View this on a computer system (not a phone) with full stereo sound. Turn up the volume until the bird song in the background is as loud as you would expect if you'd been there in person. The alligator vocalizations at that point will be as loud as they were in real life. Replay the video if necessary, because the first big vocalization happens at the two second mark.
You can also see the larger of the two gators for about half of the clip. He's way out in the water to center left, about half way down, between the horizon and the shore. You can see him moving but then my iPhone refocused on my rear door no-see-um screen, and the view of the critter was lost at that point.
This is why I like camping in a van, instead of in a tent on the ground. I can sit up in bed and slam that rear door shut if I need to. For a few moments this morning as I was figuring out what all this ruckus was that was transpiring around me, I thought I'd need to be slammin'. That's a HUGE gator to be making that intensity of noise. There are gator warning signs posted in this park. This is why.
Our friend's 2007 Airstream Interstate (same year as ours) developed a leak in its propane fill line. An uncontrolled release of propane would occur every time he attempted to fill his tank. Needless to say, this was acutely dangerous, so he had it repaired at a commercial RV facility in the greater Houston area.
I helped to research the issue to understand more thoroughly why the failure happened, and what we owners of this vintage of Interstate should do in the face of it, if anything. Here's a summary of my findings.
This is what the removed hose segment looked like (I retrieved it from the repair facility to study it). There was no visible damage or wear of any kind on the hose. I could not see any tears or breaches. A repair shop representative had stated to me that, not only was it leaking, it appeared as if it might be leaking from more than one location.
And these were the identifying markings on it.
Those letterings are very difficult to read, so let me summarize as best I can make them out:
That's a new segment of hose on the left - the fill line. And a segment of OEM hose on the right.
And some additional detail on the replacement hose (bottom segment). Both of our rigs have propane fill ports on the street sides of the vehicles, whereas the tanks themselves are mounted under the chassis at the curb sides. So the fill line runs all the way underneath the vehicle. I took this picture looking upward at the underside of his chassis.
According to the repair facility, no OEM stock item was available as a replacement for this hose. They had to contract out for the fabrication of the new hose segment. Here's some of the stenciling detail on the product that they chose:
Obviously the specs on the replacement suggest a greater durability and construction standard than the original. A hose of this higher caliber may not strictly be required for this application, but as with many repair jobs these days, labor is so much more expensive than materials that one might as well use the best quality materials available whether they are strictly needed or not.
The obvious question is, why did the original hose fail? Our rig has visually-identical LP hose segments, so the answer figures into our decision tree about how to manage our propane system going forward. We had our propane tank replaced about a year and a half ago (blog post here) but the hoses were not replaced simultaneously because there appeared to be no problem with them.
I screengrabbed it in case it disappears from the internet.
I then phoned the manufacturer Parker Hannifin Corp.to get more details. Obviously the recall was on an older hose lot, but I didn't initially know how to interpret the markings on this one. I spoke with two customer service reps who told me the following:
The marking "1006" indicates the hose was manufactured in October 2006, which is consistent with the age of our rigs.
"MH8742" indicates a technical standard. In this case, and as the CPSC recall notice confirms, this type of hose was typically used in consumer-grade gas BBQs.
The rep stated that a leak emanating from a 10-year-old segment of this hose is not an unexpected event. A hose that old is near the end of its useful life; they don't last forever. If the hose had been years younger and developed a leak, they (Parker) might be interested in retrieving it to study what happened. But not a hose this old.
This particular hose failure occurred near a time when many of us are extremely interested in learning what transpired to cause the Roadtrek fire in California just a few weeks ago - that vehicle was also a T1N Sprinter-based Class B RV of similar vintage to ours. That incident appeared as if it might be linked to an uncontrolled release of propane, but to date, no story is known to have emerged regarding the cause (see this Air Forums thread for discussion as well as this Class B Forum thread). I'll leave you with the full live news video of that event as it unfolded, as you ponder the question of how to manage your own propane system.
Inch by inch, life's a cinch. Yard by yard, life is hard.
There are numerous versions of that quote floating around out there, and we may never know who coined the original phrase. Given that Ms. Giffords is married to an astronaut and lived a few miles from us, and given that my husband works as a Flight Controller for the International Space Station, I thought I'd use this one.
"Inch by inch" is my best piece of advice where DIY is concerned, and I'm going to give an example of what I mean with this blog post. It's fairly unlikely that there's another person out there who will need to do this exact mod to their Airstream Interstate, but that's not the point. The point is to illustrate the general headspace associated with tackling modifications when you possess no formal skill in the area of issue, which is the case with me when it comes to woodworking and metalworking. I hear from people who express reservations about their own ability to tackle DIY jobs and van modifications. A lot of that can be overcome by simply taking things one small step at a time.
Let me start from the very beginning and proceed incrementally with successive photos to show you what I mean.
Originally, the space under our coach's closet contained this conventional electrical converter and a bunch of miscellaneous electrical and water lines kinda tossed back behind it. You can see that there's a mounting panel cut out of cabinetry material, to which this converter was attached.
This is what that mounting panel looked like when removed from the Interstate. It's a piece of OEM cabinetry material, but it was cut very crudely by Airstream. You can see that the cut lines are jagged and the right side leg is a conspicuously different width than the left side leg. Despite these limitations, I had to find a way to re-adapt this piece during our lithium battery upgrade project (blog posts on the technical aspects of that project itself are still to be published). I had to re-use this piece because we did not have access to any more of this cabinetry material.
This is what the lithium install looked like with the closet door removed, closet floor removed, and that front mounting panel also removed. You can see the shallow tray on top of the batteries, a frame painted white, but the new electrical inverter had not been installed in that spot when this photo was taken. Nevertheless, you get the general idea of this lay-out.
This was my temporary protective cover for that under-closet lithium chamber - it's simply a piece of black coroplast (plastic cardboard) with some mosquito screen covering two ventilation cut-outs, with the mosquito screen being held on the back side using duct tape. The coroplast piece was then screwed into the mounting frame using the same screws and holes that had held the original electrical converter. But that wouldn't do as a long term solution. It was strictly a stop-gap measure.
I knew that the final modified panel had to include a kick plate on the bottom. In the tiny space of the Interstate, stuff gets bumped, kicked, and generally smacked around - it happens. I didn't want anything to accidentally punch itself through that opening and impact the lithium batteries or other electric components. We have a miter saw and I've gotten reasonably good at making precise wood cuts using it. So I cut a strip of half-inch furniture-grade plywood to be added across the bottom. The plywood was left over from my custom closet shelf project.
You might observe that it's a very thin kick plate that I added above - possibly not very strong. But knowing that the original converter opening had been crudely cut by Airstream, I knew I'd have to make an overlay for the ventilation opening. There was no way to re-cut that panel to make it visually presentable, especially given that one leg was wider than the other. So I began to measure for a quarter-inch furniture-grade plywood overlay to hold the ventilation screen. Together with the half-inch strip at the bottom, it would be strong enough when all attached together.
At that point I needed to size the opening. I wanted as large an opening as possible for maximum ventilation, but I had to account for the irregularity of the underlying cabinetry mounting piece. I settled on this size as represented by the blue construction paper, and my husband and I worked together to cut the opening. Basically, he used a jig saw freehand, with me standing on the workbench, standing on top of this piece of plywood to hold it steady as he cut (we don't own a lot of sophisticated woodworking tools).
OK, so now I'm one more inch further along in this process, with the overlay cut. Next I painted it and the underlying strip using a Sherwin Williams oil-based enamel color formulation that matched our Interstate's counter tops.
Once the paint had dried, I needed to determine how large to order the perforated aluminum sheet, which was by far the most expensive part of this process (about $37 with tax, shipping, and handling). For that reason, I wanted it to be as large as the opening would tolerate, knowing that we might do further mods down the road and maybe I'd want to re-purpose that piece on a different future cabinetry mod. So here you see the overlay opening in blue, and the aluminum plate sizing in pink. Given that we are not professionals, we always create project mock-ups out of cardboard and/or construction paper. It's a practice that tends to eliminate both accidents and unforeseeable sizing mistakes, no matter what we are working on.
After the aluminum piece arrived, the next task was to attach it to the gray painted overlay. This was more challenging than you might first assume, because I was using the existing perforations rather than drilling holes electively in locations of my choice. As such, I had to drill the small bolt holes partially blindly from the back side. You can see that I'm a couple of millimeters off being completely centered with those bolts. As my husband would say, "If you could achieve better than that on a first try, then you wouldn't be called a DIYer. You'd be called a professional instead and you'd be getting paid accordingly."
I had originally planned to add a second quad of small bolts to hold the overlay to the original cabinetry mounting piece. But once I realized that my first four bolts were slightly off center, I didn't want to add any more because it would visually amplify the imperfection. For that reason, I decided to attach the overlay to the original cabinetry piece using 3M exterior grade double-sided tape, one of the few applications in which I would agree to use that product (adhesive products generally don't stand up well here in the Deep South).
However - next inch please - using the 3M tape caused a domino effect in that the overlay was now standing a bit proud of the cabinetry mounting piece. Which means that my strapping for the bottom reinforcement strip was no longer flush. So I added a spacer washer on either side in order to close the gap between the kick plate strip and the small mending plates I was using to attach it to the cabinetry mounting piece, as you can see above.
In order to create a good seal along the bottom of this workpiece, I had to add something flexible and compressible to exclude dirt or spilled materials from potentially penetrating the bottom edge and entering the lithium chamber. This is what I chose.
And here you see it applied to the bottom edge.
My husband wants to be able to pull off key cabinetry pieces quickly without having to mess with screw drivers and hardware. For that reason, we've used neodymium magnets to attach certain structural pieces, rather than fixed screws. Several of them were attached to the back of this workpiece to hold it in place against the cabinetry frame below the closet.
This and the jig-saw cut to the overlay were the only parts of this project that my husband assisted with - I could have done the entire job without him, but two heads are better than one, and he decided that he wanted to counter-sink screws into the steel washers that would go on cabinetry frame, to which the neodymium magnets would attach. "You don't have to make every last thing fancy," I noted to him as he was purchasing the counter-sink drill bit needed to do this. "What's the point of doing any project if you're not learning at least one new thing in the process?" he asked.
I replied (paraphrased), "I've got four additional projects stacked up on the heels of this one. I'd never get them all done if I don't simplify and choose a path of least resistance at times."
Here's the counter-sunk screw sitting in its metal washer, stuck to the neodymium magnet in the workpiece.
And this is what it looks like from above, peering down into the small gap created as the new front panel stands a bit proud of the existing cabinetry frame. That small gap allows one's fingers to pry the piece off the cabinetry - in other words, we designed it this way intentionally. Those neodymium magnets are very strong, and leverage is required to dislodge them.
The mat you see lining the closet floor is an IKEA Oplevwhich I cut to the shape of the closet. Its purpose is to trap grit and dirt that falls off my folding bicycle which I store here. I don't want that dirt making its way down into the lithium chamber.
And after proceeding through this little project all those incremental inches one at a time, here's the final result.
I think it looks pretty good. It does a good job of resurrecting a badly-cut cabinetry piece while meeting the ventilation and chamber protection goals.
This project represents one more small step in the life of a couple of van DIYers.